What Do You Do in Minecraft? Your First Day Survival Guide
Quick Answer
What do you do in Minecraft? On your very first day, you do four things in this order: punch trees for wood, craft a crafting table and basic tools, gather food, and build a shelter before the sun sets. Minecraft has no quest markers and no tutorial telling you any of this, which is exactly why so many new players spend night one being chased across a dark field by a zombie.
Your first Minecraft day lasts ten real world minutes of daylight. Ten minutes, then seven minutes of night where hostile mobs spawn in any unlit space. That’s the whole clock, and almost every beginner blows it by wandering off to explore a cave at minute three.
Ask what can you do in Minecraft and the honest answer is almost anything: build cities, automate farms with redstone, fight a dragon, or just wander. None of that matters yet. What you do in Minecraft on day one is much narrower, and getting that narrow list right is what earns you access to everything else.
Here’s what most guides miss: the actual goal of day one isn’t gathering the most resources. It’s ending the day with a light source, a door between you and the outside, and enough food that you’re not starving at dawn. Everything else is optional. Let’s walk through how to get there with time to spare.
What Should You Do First in Minecraft Survival Mode?
Your first sixty seconds set the tone for the entire session, and standing still admiring the scenery is the most expensive mistake available to you.
Understand your first day goals
Day one has exactly three non negotiable objectives: basic tools, a food source, and a secure shelter. Everything else, mining, exploring, finding a village, can wait until you’ve survived to morning. Treat day one as a race against a ten minute daylight timer rather than an open ended sandbox session, and your survival rate climbs immediately.
Check your surroundings and find useful resources
Spin the camera before you move. You’re looking for trees first, then a hillside or exposed stone face, then any animals grazing nearby. Cows, pigs, chickens, and sheep are all useful, and sheep in particular matter because wool becomes your bed.
Note your spawn location too. A distinctive landmark, a tall mountain, an unusual tree shape, gives you a return route later when you inevitably wander further than intended.
Collect wood before nightfall
Wood is the foundation of everything early game. Punch a tree trunk with your bare hands, collect the logs that drop, and keep going. Each log converts into four wooden planks, and you’ll want considerably more than you think.
Replant saplings as you go. Leaves drop saplings when broken, and a few seconds of replanting turns your starting area into a renewable resource supply rather than a stripped clearing.
Why time management matters on day one
A full Minecraft day cycle runs twenty real world minutes: roughly ten minutes of usable daylight, about seven minutes of night, and short dusk and dawn transitions between. Once you internalize that you have ten minutes of safe working time, the panic of night one mostly disappears.
With the clock understood, here’s the exact sequence that gets you through it.
How to Get Started in Minecraft Step by Step
Follow these eight steps in order and you’ll be indoors with a light source well before dark.
Step 1: Gather logs and make planks
Break down four to six trees, which gives you roughly twenty to thirty logs. Open your inventory, place logs in the crafting grid, and convert them into wooden planks at a rate of one log to four planks.
Step 2: Craft a crafting table
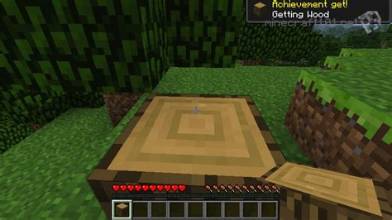
Four wooden planks arranged in a two by two square makes a Crafting Table. Place it down somewhere you’ll remember. That three by three crafting grid unlocks nearly every recipe worth having, and the two by two inventory grid alone won’t get you tools.
Step 3: Make your first set of tools
Craft sticks first, since two planks stacked vertically yields four sticks. Then make a wooden pickaxe (three planks plus two sticks), a wooden axe, and a wooden sword. Skip the wooden shovel for now unless you’re planning to dig sand or clay.
Wooden tools have terrible durability, roughly sixty uses. They exist purely to get you stone.
Step 4: Gather stone and upgrade your tools
Find exposed stone on a hillside or dig into the ground a few blocks. Mine at least twenty cobblestone with your wooden pickaxe, then immediately craft a stone pickaxe, stone axe, and stone sword. Stone tools last roughly twice as long and mine faster, and a stone pickaxe is the minimum requirement for mining iron.
Step 5: Collect coal or make a reliable light source
Coal appears as black speckled ore in exposed stone, often on hillsides at surface level. One coal plus one stick crafts four torches, and torches emit light level fourteen, which is more than enough to prevent monster spawning in a lit room.
No coal nearby? Build a Furnace from eight cobblestone and smelt logs into charcoal instead. Charcoal works identically to coal for torches, and this workaround is genuinely underused by beginners who spend ten minutes hunting for coal they didn’t need.
Step 6: Gather enough food for survival
Kill two or three cows or pigs for raw meat. Cows also drop leather, useful later. Chickens work but drop less food per kill. Cook the meat in your furnace, since cooked food restores substantially more hunger than raw.
Step 7: Build a shelter before night
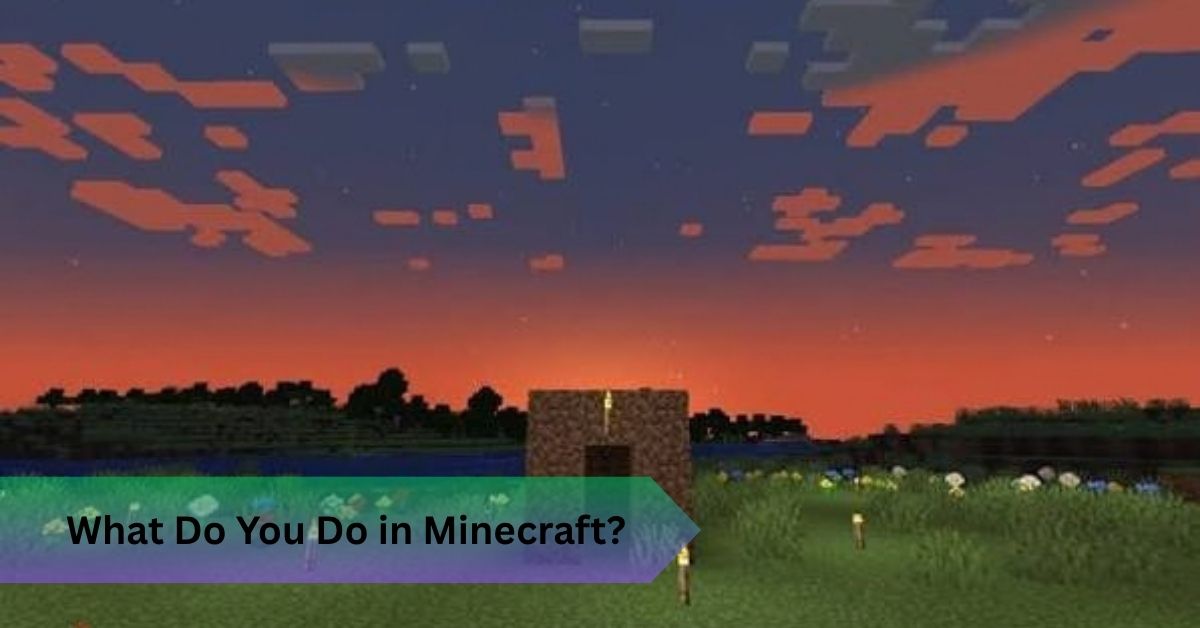
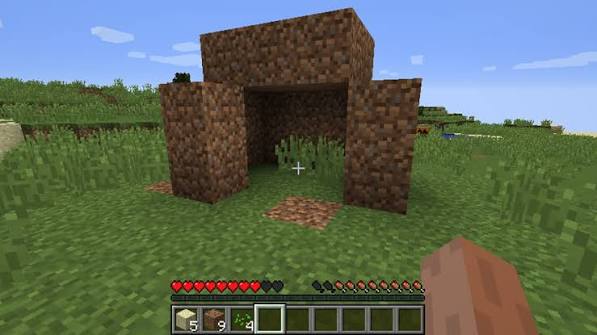
When the sky starts shifting orange, stop what you’re doing. A shelter can be as simple as a five by five box of dirt or cobblestone with a door and a torch inside. Ugly works. Dead doesn’t.
Step 8: Craft essential survival items
With your remaining time, craft a Chest (eight planks) for item storage and a Bed if you managed to find wool. A bed does two jobs that no other item does: it skips the entire night and sets your respawn point, which means dying no longer sends you back to a distant world spawn.
Knowing the steps is one thing; knowing quantities is what stops you from running out halfway through.
What Should You Collect on Your First Day?
Vague advice to “gather wood” leaves beginners guessing. Here are actual numbers worth targeting.
Wood and basic building materials
Aim for twenty to thirty logs minimum. That covers your crafting table, a full tool set, torch sticks, a chest, a door, and a bed frame, with enough spare planks for basic building.
Stone and fuel resources
Twenty to forty cobblestone handles your stone tools, a furnace, and a sturdy shelter wall. Five to ten coal keeps you in torches and furnace fuel for several days.
Food sources
Six to ten pieces of cooked meat. Raw Beef becomes Steak in a furnace, Raw Chicken becomes Cooked Chicken, and both restore far more hunger cooked than raw. Apples occasionally drop from oak leaves as a bonus.
Wool for making a bed
Three wool blocks plus three planks makes a bed. Shears (two iron ingots) harvest three wool per sheep without killing it, but on day one you likely lack iron, so killing three sheep for one wool each is the realistic path.
Seeds, saplings, and other useful items
Break tall grass for wheat seeds, which start your first crop farm. Collect saplings while chopping trees. Grab any mushrooms, melons, or sugar cane you pass, since they cost nothing to pick up and become useful within a few days.
How much of each resource should you gather?
| Resource | Day One Target | Primary Use |
| Logs | 20 to 30 | Tools, crafting table, chest, door, bed |
| Cobblestone | 20 to 40 | Stone tools, furnace, shelter walls |
| Coal or charcoal | 5 to 10 | Torches, furnace fuel |
| Cooked food | 6 to 10 | Hunger and health regeneration |
| Wool | 3 | Bed |
| Wheat seeds | 3 to 6 | Starting a crop farm |
Resources in hand, surviving the night becomes a solved problem rather than a gamble.
How Do You Survive Your First Night in Minecraft?
Night one kills more new players than anything else in the game, and it’s almost entirely preventable.
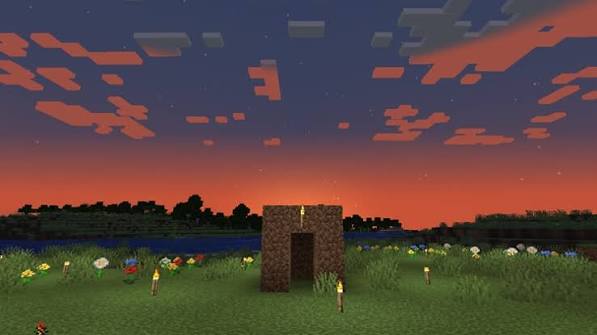
Why you should have a shelter before sunset
Hostile mobs spawn in darkness. Zombies chase you, Skeletons shoot arrows from range, and Creepers approach silently before exploding and taking your blocks and your inventory with them. Being outside after dark with wooden gear is a losing fight.
Build a simple starter house
Five-by-five floor plan, walls three blocks high, a flat roof, a wooden Door, and a torch inside. Add windows made from glass later; on night one, solid walls matter more than the view.
Use a cave as temporary shelter
Caves work in an emergency, with one critical caveat: seal the entrance behind you and light the interior thoroughly. An unlit cave connects to a whole network of dark tunnels full of spawning mobs, which makes it a worse option than a dirt box on the surface.
Craft and place torches
Place torches every six or seven blocks inside your shelter and immediately outside your door. Light level zero is where hostile mobs spawn in Java Edition, so consistent interior lighting eliminates spawns inside your base entirely.
Make a bed and set your spawn point
Sleeping in a bed skips night completely and sets your respawn point at that bed. That second function is the one beginners undervalue, since dying at world spawn after building a base two hundred blocks away is a genuinely miserable walk.
How to deal with hostile mobs
Avoid them on day one. If you must fight, back into a corridor so only one mob reaches you at a time, and never let a Creeper get within three blocks. Creepers detonate after a short fuse, and the explosion destroys terrain along with your health.
What to do if you cannot find wool before night
Seal yourself in and wait it out, or dig down two blocks, place a block over your head, and sit through the seven minutes. Not glamorous. Completely effective. You can also mine while enclosed to make the time productive rather than idle.
Surviving the night is step one; managing hunger is what keeps you alive through the following days.
How Does Food and the Hunger System Work?
Hunger is the mechanic that quietly ends more survival runs than combat does, mostly because new players don’t realize how it connects to healing.
What does the hunger bar do?
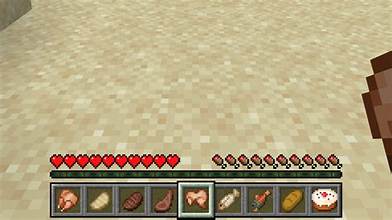
Your hunger bar sits above your hotbar as ten drumstick icons, representing twenty hunger points. Activity drains it: sprinting, jumping, fighting, and mining all consume hunger faster than standing still.
Which foods are best for early survival?
Steak and Cooked Porkchop lead the early game, restoring eight hunger points each with strong saturation, meaning they keep you full longer. Bread restores five and is easy to farm from wheat. Golden Carrots offer the best saturation in the game but require gold you won’t have on day one. Cooked Cod works well in coastal spawns.
How to cook food safely
Place raw meat in a Furnace with coal, charcoal, or spare wooden planks as fuel. Cooking roughly doubles the hunger restored and eliminates the food poisoning risk that raw chicken carries.
Why you should keep extra food in your inventory
Running out of food far from base means no health regeneration during a fight you can’t win. Carry at least five items of cooked food whenever you leave your shelter, and store surplus in a Chest rather than dropping it.
How hunger affects health and sprinting
Two thresholds matter enormously. Health only regenerates when your hunger bar sits at eighteen points or above, and you cannot sprint at all below six points. Most beginners eat only when the bar looks visually low, which means they spend most of their playtime unable to heal.
Easy ways to build a sustainable food supply
Plant wheat seeds in tilled dirt beside water for bread. Breed cows or pigs by feeding two of them wheat or carrots to create a renewable meat source. A small twelve-block crop farm plus two breeding cows solves food permanently within a few in-game days.
With food and shelter handled, day two is where the game genuinely opens up.
What Should You Do After Surviving Your First Night?
Day two is when Minecraft stops being survival triage and starts being the game people actually recommend. If you’re wondering what you should I do in Minecraft once the immediate danger has passed, this is the list.
Explore the nearby area
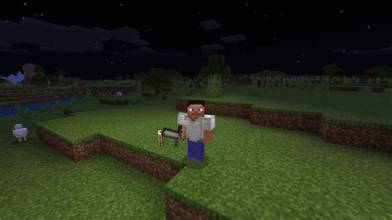
Venture out in one direction while placing occasional torches as breadcrumbs. Note landmarks for your return route, and resist the urge to sprint off in a straight line for five minutes.
Find a village and useful structures
Villages contain Villagers who trade, plus free crops, beds, and often iron tools in chests. Finding one within a few hundred blocks of spawn genuinely accelerates your entire early game.
Start a small farm
Till dirt with a hoe next to a water source, plant your wheat seeds, and you have bread on a timer. Crop farming is the single highest return investment available in the early game relative to effort.
Gather iron and make better equipment
Iron ore appears as tan speckled blocks and requires at least a stone pickaxe. Smelt it into iron ingots, then craft an iron pickaxe, iron sword, and eventually iron armor. Iron gear roughly doubles your effective survivability.
Create a furnace and storage area
Set up two or three furnaces side by side and several chests with organized item storage. Sorting your inventory into labeled chests sounds tedious and saves genuine hours across a long world.
Upgrade your shelter into a permanent base
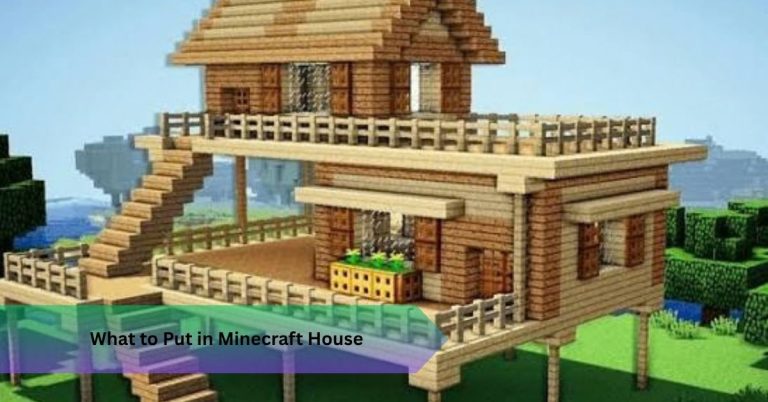
Expand your dirt box into something you actually want to return to. Add a roof, windows, stairs, interior lighting, and a walled area for animals. Your temporary shelter becoming a real base is the moment a world starts feeling like yours.
Prepare for your first mining trip
Before descending, pack torches, food, a spare pickaxe, and cobblestone for sealing off dangerous openings. Dig a staircase downward at a diagonal rather than a vertical shaft, since a staircase lets you walk back out, and a vertical shaft does not.
Tool priority matters here, so let’s get specific about what to craft and when.
Which Tools and Items Should You Craft First?
Resource scarcity on day one means crafting order genuinely affects your survival odds.
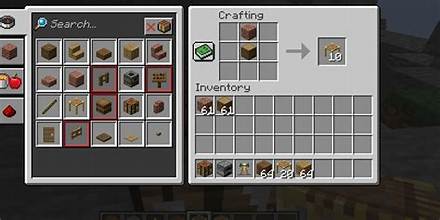
Pickaxe, axe, shovel, and sword
Pickaxe first, always, since it unlocks stone and every material tier beyond. Axe second for faster wood collection. Sword third for defense. Shovel last, since punching dirt works acceptably in a pinch.
Furnace and essential crafting stations
Crafting Table on minute two, Furnace as soon as you have eight cobblestone. Those two blocks unlock cooked food, charcoal, and metal smelting, which is most of the early game progression.
Shield for early game protection
A Shield needs six planks and one iron ingot, so it arrives on day two rather than day one. Blocking with a shield negates Skeleton arrows entirely, which transforms early combat.
Bucket and why it becomes useful
Three iron ingots make a Bucket. Water buckets create farm irrigation, extinguish fire, and safely neutralize lava, and that last function prevents a specific and very common death during your first mining trip.
Armor and when to start crafting it
Skip leather armor unless you have spare leather sitting around. Wait for iron, which requires twenty-four ingots for a full set. Prioritize an iron chestplate and helmet first if resources are tight, since those cover the largest damage reduction per ingot.
How to prioritize limited resources
Tools before decoration, always. Light before comfort. Food before exploration. New players routinely burn thirty logs on a decorative floor and then have no planks for a door, which is a genuinely avoidable way to lose a night.
Speaking of avoidable mistakes, here are the ones that catch nearly everyone.
Common Beginner Mistakes to Avoid in Minecraft Survival
Every experienced player made most of these, and knowing them in advance saves you the learning tax.
Waiting too long to build a shelter
The most common fatal error. Start building when the sky turns orange, not when it turns dark. Dusk gives you roughly ninety seconds of warning, and a minimal shelter takes about that long.
Exploring without food or torches
Wandering into a cave with three torches and no food ends predictably. Pack for the trip you might have, not the trip you planned.
Digging straight down or straight up
Digging straight down drops you into lava or a ravine with no warning and no escape route. Digging straight up while standing under gravel or sand buries you. Neither has a good outcome, and both are habits worth breaking immediately.
Fighting too many mobs at once
Open field combat against three zombies with a stone sword is a loss. Retreat into a one-block-wide corridor and fight them single file instead.
Carrying valuable items without a safe storage area
Dying with your full inventory of iron and diamonds scatters everything at the death location, which despawns after five minutes. Store valuables in a chest at base before risky expeditions.
Wasting resources on unnecessary items
Crafting a full set of wooden tools including shovel and hoe when you’ll replace them within two minutes wastes planks you need for a door. Craft what the next ten minutes require.
Getting lost without a navigation plan
Press F3 in Java Edition to see your coordinates and write down your base location. Without coordinates or a torch trail, finding your way home is genuinely difficult, and a lost base is functionally a lost world.
Frequently Asked Questions About Starting Minecraft Survival
What should I do first in Minecraft Survival?
Punch trees for wood, craft a crafting table and basic tools, gather food, and build a lit shelter before the ten-minute daylight window closes.
How do I survive my first night in Minecraft?
Enclose yourself in a sealed, lit shelter before sunset. A five-by-five dirt box with a door and a torch works perfectly, and a bed lets you skip the night entirely.
What should I build first in Minecraft?
A simple enclosed shelter with a door and interior lighting. Aesthetics come later; on day one, walls and light are the only requirements.
How do I get food quickly in Minecraft?
Kill nearby cows or pigs and cook the raw meat in a furnace. Cooked meat restores roughly double the hunger of raw, and apples from oak leaves work as an emergency backup.
Do I need a bed on the first day?
Not strictly, but it helps enormously. A bed skips the entire night and sets your respawn point, so it’s worth killing three sheep for wool if you spot any before dark.
What tools should I make first in Minecraft?
A wooden pickaxe first to unlock stone, then a wooden axe and sword, then upgrade all three to stone as soon as you have twenty cobblestone.
Where should I build my first Minecraft house?
Somewhere flat, near trees, with visible stone and water nearby if possible. Avoid building directly against unlit cave openings, since mobs spawn inside and walk straight into your base.
What should I do after my first night?
Explore locally, find iron, start a wheat farm, set up storage chests, and upgrade your temporary shelter into a permanent base before attempting a deep mining trip.
Conclusion:
What do you do in Minecraft comes down to a simple loop that never really changes: gather resources, craft better tools, secure your space, then push a little further than you did yesterday. Day one only asks four things of you, wood, tools, food, and a lit shelter before dark, and getting those four right turns night one from a panic into a non event. Load up a new Survival world, set difficulty to Easy for your first run, and give yourself the full ten minute daylight window to hit those four goals before you let yourself explore anything. Everything genuinely interesting in this game happens after you stop dying to the first sunset.
Recommended Articles
How Do You Jump in Minecraft? Distance, Height & Movement Guide
Minecraft Online: How to Play With Friends, Multiplayer Options & Safety Guide